Difference between revisions of "LXDM Configuration/ru"
Views
Actions
Namespaces
Variants
Tools
(Created page with "= Обзор = {| |- | thumb|left|454px|Unthemed LXDM || {{BoxInfo|Подсказка|Дополнительные возможности настро...") Tags: Mobile web edit Mobile edit |
(Created page with "LXDM по-прежнему можно легко настроить в соответствии с личным вкусом и предпочтениями, включая в...") |
||
| Line 7: | Line 7: | ||
LXDM отвечает за предоставление экрана входа в систему, на котором можно выбрать предпочтительный язык и среду рабочего стола для вашей учетной записи (учетных записей). Он также функционирует как барьер безопасности для предотвращения несанкционированного доступа к вашей системе. | LXDM отвечает за предоставление экрана входа в систему, на котором можно выбрать предпочтительный язык и среду рабочего стола для вашей учетной записи (учетных записей). Он также функционирует как барьер безопасности для предотвращения несанкционированного доступа к вашей системе. | ||
LXDM | LXDM по-прежнему можно легко настроить в соответствии с личным вкусом и предпочтениями, включая возможность включения автологина, изменения фонового изображения, удаления языкового меню и отключения списка пользователей. | ||
|} | |} | ||
= | =Вариант 1: Использование инструмента настройки= | ||
{| | {| | ||
|- | |- | ||
|[[file:Lxdm-config.jpg|thumb|left|454px| LXDM | |[[file:Lxdm-config.jpg|thumb|left|454px| Инструмент настройки LXDM]] || Приложение '''LXDM Configuration''' можно найти в разделе '''System''' в меню XFCE и Cinnamon. Пользователи Openbox также найдут его в разделе ''Система'' при использовании приложения Openbox ''AppFinder''. В качестве альтернативы - поиск ''lxdm'' в ''Synapse'' даст правильный результат. | ||
Для запуска из командной строки используйте | |||
{{UserCmd|command=sudo lxdm-config}} | {{UserCmd|command=sudo lxdm-config}} | ||
|} | |} | ||
= | =Вариант 2: Ручное редактирование файла конфигурации= | ||
Для выполнения любой или всех этих задач необходимо сначала открыть файл конфигурации LXDM (lxdm.conf) с помощью терминала. Синтаксис команды для открытия конфигурационного файла LXDM следующий: | |||
{{UserCmd|command=sudo [ | {{UserCmd|command=sudo [текстовый редактор] /etc/lxdm/lxdm.conf}}. | ||
Например, если Вы хотите отредактировать файл в терминале с помощью nano (стандартный текстовый редактор на базе терминала), введите: | |||
{{UserCmd|command=sudo nano /etc/lxdm/lxdm.conf}} | {{UserCmd|command=sudo nano /etc/lxdm/lxdm.conf}}. | ||
В противном случае - если вы установили полную версию Manjaro (т.е. не NET-редакцию) - вам может быть проще использовать предустановленный текстовый редактор ''gedit''. Он откроет файл конфигурации как документ, что облегчит его чтение и редактирование. Чтобы использовать ''gedit'' вместо этого, введите: | |||
{{UserCmd|command=sudo gedit /etc/lxdm/lxdm.conf}} | {{UserCmd|command=sudo gedit /etc/lxdm/lxdm.conf}}. | ||
== | ==Включение автологина== | ||
{{BoxInfo|Info| | {{BoxInfo|Info|Автологин будет работать только при загрузке Manjaro. В противном случае - при выходе из системы, вам все равно придется ввести имя пользователя и пароль, чтобы вернуться в среду рабочего стола}}. | ||
Можно полностью обойти экран входа и сразу перейти в выбранное окружение рабочего стола при загрузке Manjaro. Для этого необходимо выполнить два основных шага: во-первых, установить учетную запись пользователя для автоматического входа в систему, а во-вторых, указать конкретное окружение рабочего стола для запуска. | |||
=== | ===Шаг 1: установка пользователя=== | ||
Первым шагом является настройка учетной записи пользователя для автоматического входа в систему. Это делается в следующем разделе, расположенном в верхней части конфигурационного файла LXDM: | |||
{{File|file=/etc/lxdm/lxdm.conf|content=<pre> | {{File|file=/etc/lxdm/lxdm.conf|content=<pre> | ||
[base] | [base] | ||
## | ## раскомментируйте и задайте имя пользователя autologin для включения автологина | ||
# autologin=dgod</pre>}} | # autologin=dgod</pre>}} | ||
В качестве примера, LXDM был настроен ниже, чтобы персональная учетная запись пользователя с именем 'carl' могла входить в систему автоматически: | |||
{{File|file=/etc/lxdm/lxdm.conf|content=<pre> | {{File|file=/etc/lxdm/lxdm.conf|content=<pre> | ||
[base] | [base] | ||
## | ## раскомментируйте и установите autologin имя пользователя, чтобы включить автологин | ||
autologin=carl</pre>}} | autologin=carl</pre>}} | ||
Убедитесь, что между командой '''autologin=''' и именем вашей личной учетной записи пользователя не должно быть пробелов. После этого необходимо выполнить второй и последний шаг по установке среды рабочего стола по умолчанию для автоматического запуска. | |||
=== | ===Шаг 2: Установка окружения рабочего стола=== | ||
Необходимо определить, в какое окружение рабочего стола будет загружаться компьютер, и/или если установлено несколько окружений рабочего стола. Это задается в следующем разделе, расположенном в верхней части конфигурационного файла: | |||
{{File|file=/etc/lxdm/lxdm.conf|content=<pre> | {{File|file=/etc/lxdm/lxdm.conf|content=<pre> | ||
## | ## сеанс или рабочий стол по умолчанию, используемый при отсутствии общесистемной конфигурации | ||
session=/usr/bin/startxfce4</pre>}} | session=/usr/bin/startxfce4</pre>}} | ||
В этом примере окружение рабочего стола по умолчанию уже установлено на XFCE, так как это была установленная редакция Manjaro. Если вы установили другую редакцию (например, Gnome/Cinnamon или KDE), то указанная сессия будет другой. Если в начале '''session=''' нет хэша ('#') (что означает, что эта команда не будет проигнорирована), и указана желаемая среда рабочего стола, то вы можете сохранить изменения и закрыть файл конфигурации, выполнив следующие действия: | |||
* '''nano''': | * '''nano''': нажмите CTRL и 'x' для выхода, 'y' для сохранения и <enter> для завершения, или | ||
* '''gedit''': | * '''gedit''': выберите опцию "сохранить" и закройте окно. | ||
Иначе, чтобы установить желаемое окружение рабочего стола: | |||
# | # Если присутствует - удалите хэш ('#') в начале '''session=''' | ||
# | # Удалите существующее окружение рабочего стола (или любой другой текст, например 'lxdm') из '''session=/usr/bin/<font color="red">[текст для удаления]</font color>''', и | ||
# | # В конце '''session=/usr/bin/''' добавьте команду для запуска выбранного/установленного окружения рабочего стола. | ||
Примеры для различных окружений рабочего стола приведены ниже: | |||
* ''' | * '''Для запуска XFCE''': | ||
{{File|file=/etc/lxdm/lxdm.conf|content=<pre> | {{File|file=/etc/lxdm/lxdm.conf|content=<pre> | ||
## | ## сеанс или рабочий стол по умолчанию, используемый при отсутствии общесистемной конфигурации | ||
session=/usr/bin/startxfce4</pre>}} | session=/usr/bin/startxfce4</pre>}} | ||
* ''' | * '''Для запуска KDE''': | ||
{{File|file=/etc/lxdm/lxdm.conf|content=<pre> | {{File|file=/etc/lxdm/lxdm.conf|content=<pre> | ||
## | ## сеанс или рабочий стол по умолчанию, используемый при отсутствии общесистемной конфигурации | ||
session=/usr/bin/startplasma-x11</pre>}} | session=/usr/bin/startplasma-x11</pre>}} | ||
* ''' | * '''Для запуска Gnome''': | ||
{{File|file=/etc/lxdm/lxdm.conf|content=<pre> | {{File|file=/etc/lxdm/lxdm.conf|content=<pre> | ||
## | ## сеанс или рабочий стол по умолчанию, используемый при отсутствии общесистемной конфигурации | ||
session=/usr/bin/gnome-session</pre>}} | session=/usr/bin/gnome-session</pre>}} | ||
* ''' | * '''Для запуска Cinnamon''': | ||
{{File|file=/etc/lxdm/lxdm.conf|content=<pre> | {{File|file=/etc/lxdm/lxdm.conf|content=<pre> | ||
## | ## сеанс или рабочий стол по умолчанию, используемый при отсутствии общесистемной конфигурации | ||
session=/usr/bin/gnome-session-cinnamon</pre>}} | session=/usr/bin/gnome-session-cinnamon</pre>}} | ||
* ''' | * '''Для запуска Razor-QT''': | ||
{{File|file=/etc/lxdm/lxdm.conf|content=<pre> | {{File|file=/etc/lxdm/lxdm.conf|content=<pre>> | ||
## | ## сеанс или рабочий стол по умолчанию, используемый при отсутствии общесистемной конфигурации | ||
session=/usr/bin/razor-session</pre>}} | session=/usr/bin/razor-session</pre>}} | ||
* ''' | * '''Для запуска Openbox''': | ||
{{File|file=/etc/lxdm/lxdm.conf|content=<pre> | {{File|file=/etc/lxdm/lxdm.conf|content=<pre> | ||
## | ## сеанс или рабочий стол по умолчанию, используемый при отсутствии общесистемной конфигурации | ||
session=/usr/bin/openbox-session</pre>}} | session=/usr/bin/openbox-session</pre>}} | ||
* ''' | * '''Для запуска LXDE''': | ||
{{File|file=/etc/lxdm/lxdm.conf|content=<pre> | {{File|file=/etc/lxdm/lxdm.conf|content=<pre> | ||
## | ## сеанс или рабочий стол по умолчанию, используемый при отсутствии общесистемного конфига | ||
session=/usr/bin/lxsession</pre>}} | session=/usr/bin/lxsession</pre>}} | ||
После завершения внесения изменений вы можете сохранить изменения и закрыть конфигурационный файл, выполнив следующие действия: | |||
* '''nano''': | * '''nano''': нажмите CTRL и 'x' для выхода, 'y' для сохранения, и <enter> для завершения, или | ||
* '''gedit''': | * '''gedit''': выберите опцию "сохранить" и закройте окно. | ||
Перезагрузите систему чтобы изменения вступили в силу. | |||
===Optional: Enable Timeout Auto-Login=== | ===Optional: Enable Timeout Auto-Login=== | ||
Revision as of 10:32, 28 December 2022
Обзор
|
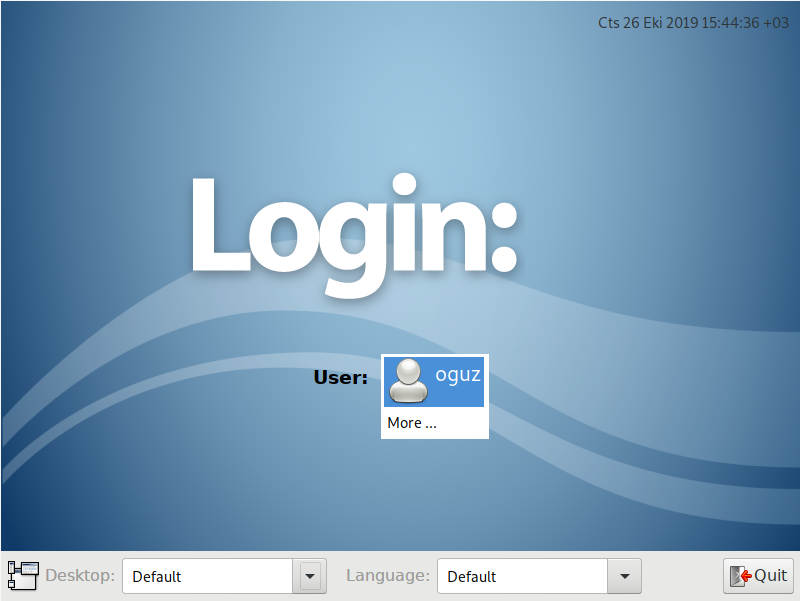
LXDM отвечает за предоставление экрана входа в систему, на котором можно выбрать предпочтительный язык и среду рабочего стола для вашей учетной записи (учетных записей). Он также функционирует как барьер безопасности для предотвращения несанкционированного доступа к вашей системе. LXDM по-прежнему можно легко настроить в соответствии с личным вкусом и предпочтениями, включая возможность включения автологина, изменения фонового изображения, удаления языкового меню и отключения списка пользователей. |
Вариант 1: Использование инструмента настройки
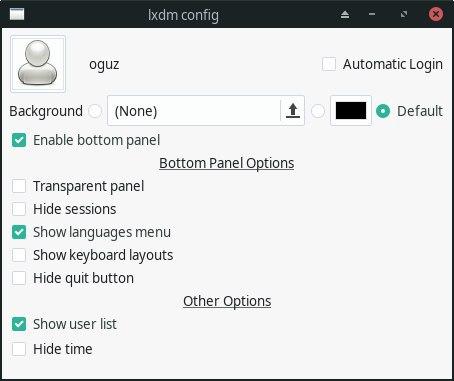
| Приложение LXDM Configuration можно найти в разделе System в меню XFCE и Cinnamon. Пользователи Openbox также найдут его в разделе Система при использовании приложения Openbox AppFinder. В качестве альтернативы - поиск lxdm в Synapse даст правильный результат.
Для запуска из командной строки используйте user $ sudo lxdm-config
|
Вариант 2: Ручное редактирование файла конфигурации
Для выполнения любой или всех этих задач необходимо сначала открыть файл конфигурации LXDM (lxdm.conf) с помощью терминала. Синтаксис команды для открытия конфигурационного файла LXDM следующий:
.
Например, если Вы хотите отредактировать файл в терминале с помощью nano (стандартный текстовый редактор на базе терминала), введите:
.
В противном случае - если вы установили полную версию Manjaro (т.е. не NET-редакцию) - вам может быть проще использовать предустановленный текстовый редактор gedit. Он откроет файл конфигурации как документ, что облегчит его чтение и редактирование. Чтобы использовать gedit вместо этого, введите:
.
Включение автологина
.
Можно полностью обойти экран входа и сразу перейти в выбранное окружение рабочего стола при загрузке Manjaro. Для этого необходимо выполнить два основных шага: во-первых, установить учетную запись пользователя для автоматического входа в систему, а во-вторых, указать конкретное окружение рабочего стола для запуска.
Шаг 1: установка пользователя
Первым шагом является настройка учетной записи пользователя для автоматического входа в систему. Это делается в следующем разделе, расположенном в верхней части конфигурационного файла LXDM:
[base]
## раскомментируйте и задайте имя пользователя autologin для включения автологина
# autologin=dgod
В качестве примера, LXDM был настроен ниже, чтобы персональная учетная запись пользователя с именем 'carl' могла входить в систему автоматически:
[base]
## раскомментируйте и установите autologin имя пользователя, чтобы включить автологин
autologin=carl
Убедитесь, что между командой autologin= и именем вашей личной учетной записи пользователя не должно быть пробелов. После этого необходимо выполнить второй и последний шаг по установке среды рабочего стола по умолчанию для автоматического запуска.
Шаг 2: Установка окружения рабочего стола
Необходимо определить, в какое окружение рабочего стола будет загружаться компьютер, и/или если установлено несколько окружений рабочего стола. Это задается в следующем разделе, расположенном в верхней части конфигурационного файла:
## сеанс или рабочий стол по умолчанию, используемый при отсутствии общесистемной конфигурации
session=/usr/bin/startxfce4
В этом примере окружение рабочего стола по умолчанию уже установлено на XFCE, так как это была установленная редакция Manjaro. Если вы установили другую редакцию (например, Gnome/Cinnamon или KDE), то указанная сессия будет другой. Если в начале session= нет хэша ('#') (что означает, что эта команда не будет проигнорирована), и указана желаемая среда рабочего стола, то вы можете сохранить изменения и закрыть файл конфигурации, выполнив следующие действия:
- nano: нажмите CTRL и 'x' для выхода, 'y' для сохранения и <enter> для завершения, или
- gedit: выберите опцию "сохранить" и закройте окно.
Иначе, чтобы установить желаемое окружение рабочего стола:
- Если присутствует - удалите хэш ('#') в начале session=
- Удалите существующее окружение рабочего стола (или любой другой текст, например 'lxdm') из session=/usr/bin/[текст для удаления], и
- В конце session=/usr/bin/ добавьте команду для запуска выбранного/установленного окружения рабочего стола.
Примеры для различных окружений рабочего стола приведены ниже:
- Для запуска XFCE:
## сеанс или рабочий стол по умолчанию, используемый при отсутствии общесистемной конфигурации
session=/usr/bin/startxfce4
- Для запуска KDE:
## сеанс или рабочий стол по умолчанию, используемый при отсутствии общесистемной конфигурации
session=/usr/bin/startplasma-x11
- Для запуска Gnome:
## сеанс или рабочий стол по умолчанию, используемый при отсутствии общесистемной конфигурации
session=/usr/bin/gnome-session
- Для запуска Cinnamon:
## сеанс или рабочий стол по умолчанию, используемый при отсутствии общесистемной конфигурации
session=/usr/bin/gnome-session-cinnamon
- Для запуска Razor-QT:
>
## сеанс или рабочий стол по умолчанию, используемый при отсутствии общесистемной конфигурации
session=/usr/bin/razor-session
- Для запуска Openbox:
## сеанс или рабочий стол по умолчанию, используемый при отсутствии общесистемной конфигурации
session=/usr/bin/openbox-session
- Для запуска LXDE:
## сеанс или рабочий стол по умолчанию, используемый при отсутствии общесистемного конфига
session=/usr/bin/lxsession
После завершения внесения изменений вы можете сохранить изменения и закрыть конфигурационный файл, выполнив следующие действия:
- nano: нажмите CTRL и 'x' для выхода, 'y' для сохранения, и <enter> для завершения, или
- gedit: выберите опцию "сохранить" и закройте окно.
Перезагрузите систему чтобы изменения вступили в силу.
Optional: Enable Timeout Auto-Login
In addition to bypassing the login screen completely, it is also possible to be automatically logged in after waiting a certain period of time as well. In this instance, after booting into the login screen, it will wait for a set period of time before automatically logging you in. This is set in the following section, located near the top of the configuration file:
## uncomment and set timeout to enable timeout autologin,
## the value should >=5
#timeout=10
- Remove the hash ('#') from the beginning of timeout= to activate it, and
- Set the number of seconds to wait at the login screen, if different from the default value of 10. As stated above the command, the number of seconds specified must be no less than 5.
As an example, LXDM has been configured below to enable timeout auto login after waiting 30 seconds:
## uncomment and set timeout to enable timeout autologin,
## the value should >=5
timeout=30
Once your amendments have been completed, you can save your changes and close the configuration file by:
- nano: Press CTRL and 'x' to exit, 'y' to save, and <enter> to finish, or
- gedit: Select the 'save' option and then close the window.
Reboot your system for the changes to take effect.
Disable Auto-Login
To restore the login screen, edit the LXDM configuration file once again and comment out the lines beginning with autologin= and session=. An example has provided below.
[base]
## uncomment and set autologin username to enable autologin
#session=/usr/bin/startxfce4
...
## default session or desktop used when no systemwide config
#session=/usr/bin/openbox
Once your amendments have been completed save your changes and close the configuration file by:
- nano: Press CTRL and 'x' to exit, 'y' to save, and <enter> to finish, or
- gedit: Select the 'save' option and then close the window.
Changing The Background Image
Once your chosen desktop environmet has been downloaded (e.g. a .png or .jpg image file), it can be set in the following section, located near the top of the configuration file:
## background of the greeter
# bg=/usr/share/backgrounds/default.png
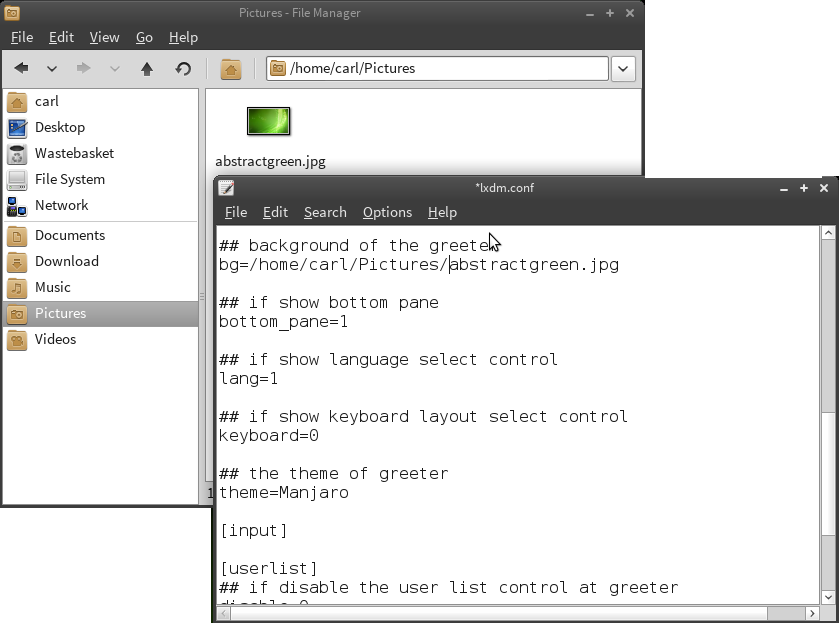
As illustrated, it will be necessary to specify the exact location of the background image to use. Although it is possible to copy the new background images to the existing backgrounds folder using Root privilages, in this instance a new folder location will be specified:
|
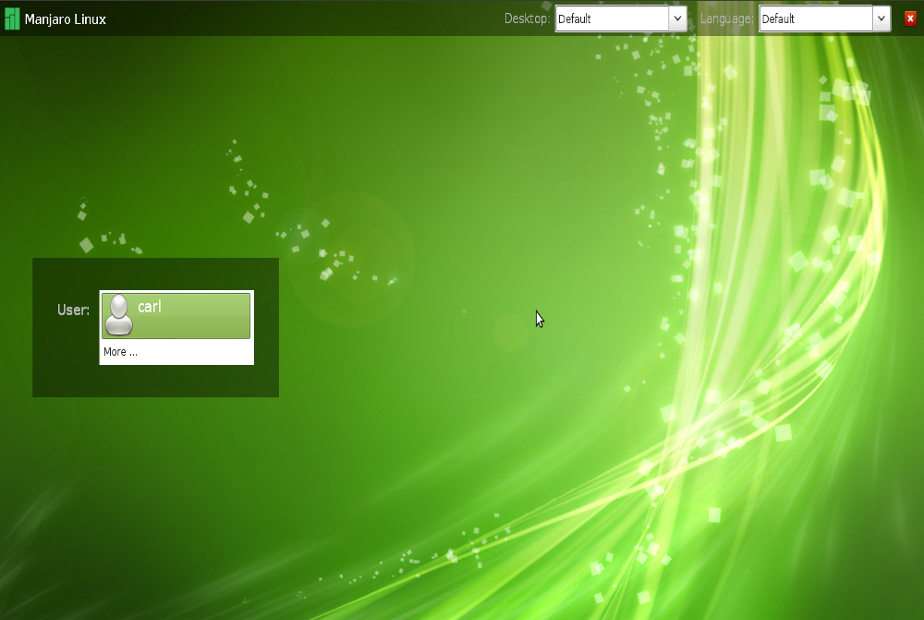
| As an example, the author has activated the ability to set backgrounds, and used a background image (abstractgreen.jpg) located in their Pictures folder. Again, note the correct use of capitalisation where required (e.g. Pictures):
/etc/lxdm/lxdm.conf ## background of the greeter bg=/home/carl/Pictures/abstractgreen.jpg Once your amendments have been completed, you can save your changes and close the configuration file by:
The change will be immediate, and may be viewed by simply logging out. |
Removing The Language Menu
| By default the drop-down Language Menu is located in the top bar. As this may serve no purpose for many users it can easily be removed. Doing so may also improve the appearance of the login screen by consequently providing a cleaner, less cluttered appearance. This is undertaken in the following section, located at the bottom of the LXDM configuration file:
/etc/lxdm/lxdm.conf ## if show language select control lang=1 All that is required to replace the '1' after the lang= command with a '0': /etc/lxdm/lxdm.conf ## if show language select control lang=0 Once your amendments have been completed, you can save your changes and close the configuration file by:
The change will be immediate, and may be viewed by simply logging out. |
Disabling The User List
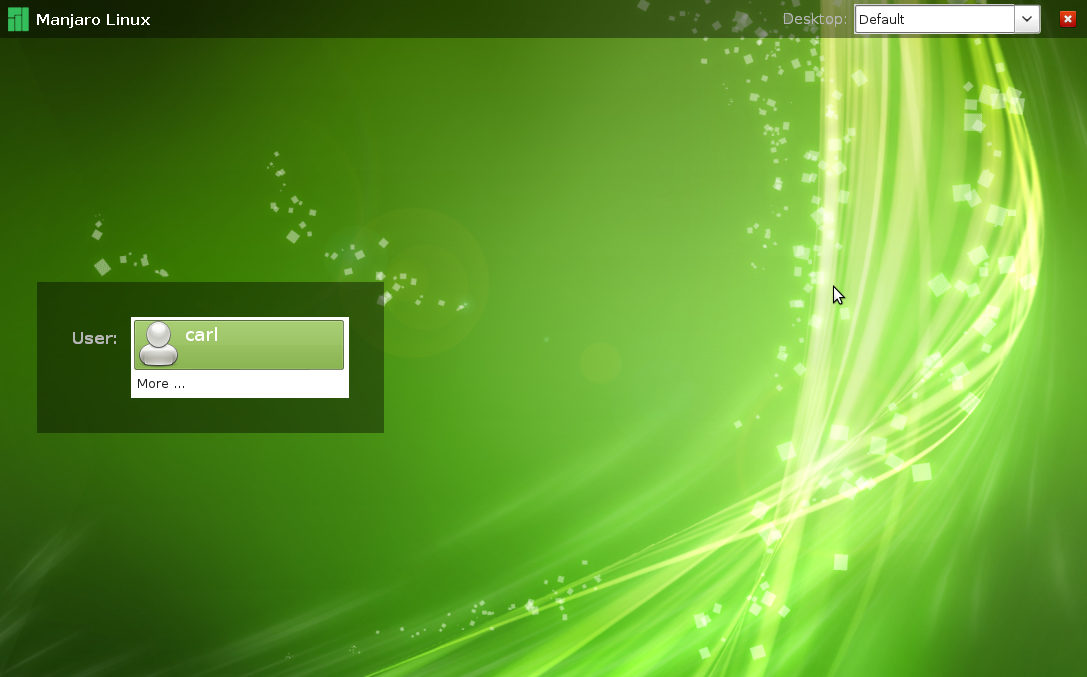
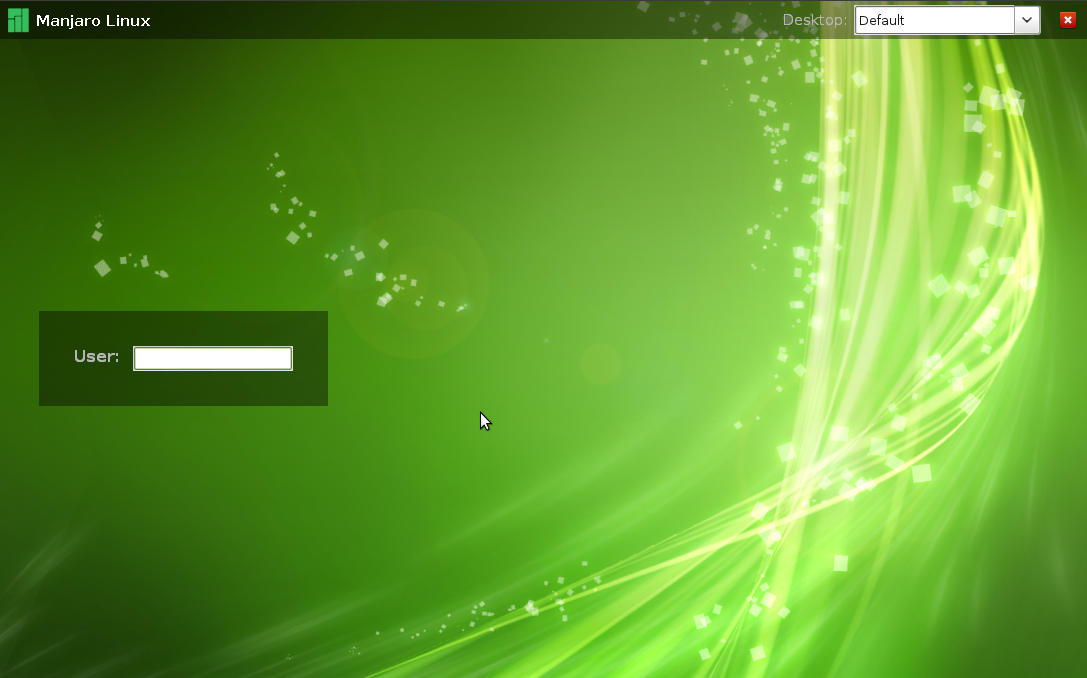
| By default, available username(s) will already be listed for selection on the login screen. For added security - and (at least for some users) to improve the appearance of the login screen - this feature can be disabled. In this instance, it will consequently be necessary to manually enter both the username and password to log on. This is undertaken in the following section, located at the bottom of the LXDM configuration file:
/etc/lxdm/lxdm.conf ## if disable the user list control at greeter disable=0 All that is required to replace the '0' after the disable= command with a '1': /etc/lxdm/lxdm.conf ## if disable the user list control at greeter disable=1 Once your amendments have been completed, you can save your changes and close the configuration file by:
|
